Installing a chimney liner kit is an essential part of owning a wood stove, pellet stove or gas fireplace, and the most efficient way to fit one into a new or existing chimney is by using chimney liner kits, which often include easy to follow Do-it-yourself instructions.
However, choosing the right chimney liner kit can be difficult, that’s why we’ve reviewed the most popular kits to make your life a little less difficult. In addition, we have assessed the most appropriate kits for some of the most common chimney scenarios, whether that be a new chimney or an old and badly maintained one.
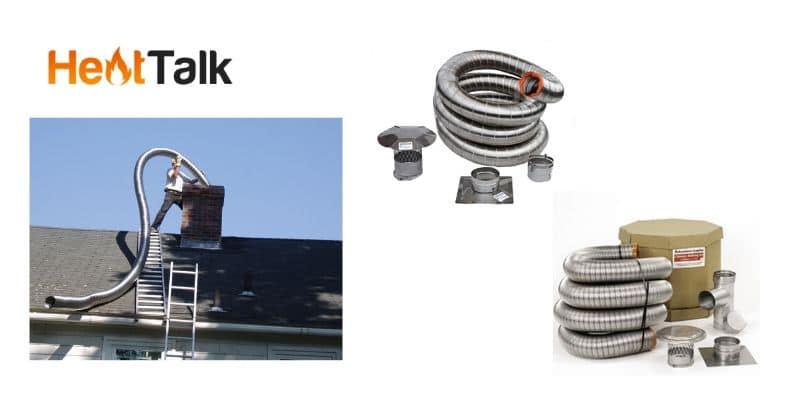
Quick Picks: Chimney Liner Kit Reviews
| IMAGE | NAME | FEATURES | |
|---|---|---|---|
 | Fireside Chimney Liner |
| Check on Amazon |
 | Rockford Smooth Wall Chimney Liner |
| Check on Amazon |
 | Rockford Chimney Liner Tee Kit |
| Check on Amazon |
*All links above will take you to the latest prices on Amazon.com or you can read our in-depth chimney liner kit reviews below.
Need help with a repair or install? Get a free estimate online from top local home service pros in your area.
- Type: Single Wall Corrugated
- DIY instructions: Yes
- Sizes: Multiple available
Easy Installation
When you are going to the difficulty of navigating a chimney top on a roof, the last thing you want is a difficult installation process.
This flexible chimney liner kit provides incredibly easy DIY instructions and for its price point is perhaps one of the easiest kits to install.

What we liked most about this kit is the fact it comes with step by step and in-depth instructions which are very helpful for the person with little experience.
Available in Multiple sizes
This chimney kit is available in multiple sizes to suit almost any type of chimney or ventilation system. Therefore, make sure you measure your chimney properly before making a purchase.
You can easily do this with a tape measure, simply drop it down your chimney and measure to the top of your fire or stove opening. It’s always advised to make it a little longer, as you can easily remove any extras using the appropriate tools.
If you are using a liner for a fireplace insert and your chimney is on the outside of your house, ensure you opt for the 1/2″ insulation that wraps around this pipe! You will regret not choosing it and will experience the issue of extreme creosote buildup within the liner.
Solid Construction
The liner itself includes a continuous strip of stainless steel that is both water and gas sealed, keeping your home as safe and as warm as possible and with 7 ply seams and 10 corrugations between each seam, helps you to deliver the flexibility needed for a low effort fitting and installation. The liner is also pest proof and rain proof thanks to the top plate with EZ connect collars and rain cap.
- Type: Smooth Wall
- DIY instructions: Yes
- Sizes: Multiple available
The Rockford Brand
Rockford chimney supplies are a family run company based in Michigan that has been in operation since 2006.
Since then they have enjoyed the rewards that naturally come with offering a good quality and complete range of hearth and fire products.

It is always beneficial to buy from a company that has a long term investment in their reputation.
Smooth Wall Liner Kit
This kit is suitable for chimneys utilising all fuel types, whether that be a wood stove, a gas fireplace or a oil heater. The price of this kit is slightly higher due to its increased quality and construction, including the smooth wall design and the extra flexibility.
Smooth wall chimney liner kits have a number of advantages over their single wall corrugated rivals – they are easier to clean, there’s less chance of creosote deposits and they retain heat for longer due to the double wall piping.
Extra Flexibility & Efficiency
Due to the increased flexibility of this kit, it is probably slightly easier to install than more rigid and cheaper designs, especially in chimneys that consist of more difficult shapes and ventilation routes.
For maximum efficiency this kit is also insulated for optimum heat retention and safety. This is a particularly good kit for wood and pellet stoves that tend to produce hotter and dirtier emissions. It fits all standard connections and can be used for wood burning, pellet, oil, and even coal heating systems.
- Type: Single Wall
- DIY instructions: Yes
- Sizes: Multiple available
Cheaper Alternative
This is another, slightly cheaper chimney kit by Rockford that is not a smooth wall kit.
As noted, the smooth wall design imparts quite a number of advantages over the single wall corrugated designs, but its certainly a budget-friendly alternative.

DIY Instructions
Like all RockFlex liners, it includes the Complete Do It Yourself installation instructions for easy fitting.
It also includes the Quick Connect System allowing you to install it in a few simple to understand steps, merely position it in place, tighten the clamps and you’re done, it’s truly as simple as that.
- Type: Single Wall
- DIY instructions: Yes
- Size: 6-Inch x 25-Feet
More for Your Money
There’s a lot more to gain from this Forever vent kit than many others and so it may not be cheap but it is also reasonably priced. However, you are also getting great value for your money.
The kit includes:
– Single Ply Liner section
– 2 part removable tee
– Tee cap
– Top plate with a built in storm collar
– Round cap
– Fasteners
– Installation instructions – Warranty card

Lifetime Warranty
The whole kit contains a lifetime warranty as detailed by the warranty card you will recieve in the package. This adds so much value and gives you a sense of security knowing that Forever Vent have such faith in their product they would grant a lifetime warranty.
Why Do you Need a Chimney Liner?
No matter what type of fuel you are using, a fire naturally produces exhaust fumes that can be detrimental to your health. For this reason, it’s essential you have a good quality chimney liner to ensure you and your loved ones are safe. Chimney liner kits are a very cost effective way to fix an unsafe, worn or otherwise inefficient chimney flue.
Chimney liners provide an important function, they serve to contain and transport potentially harmful and toxic smoke from your wood burning stove or heating appliance.
They also decrease the chance of a carbon monoxide leak, chimney fire, and creosote accumulation. They can also increase the energy efficiency of your stove and it can make maintenance of your chimney much easier.
The good news is that chimney liners aren’t difficult to install since most come with few components and in-depth instructions. A good quality liner will enable you to clean and maintain your chimney with little effort, all chimneys will need to be cleaned a few times a year, so with a flexible chimney liner, the job is much easier.
For instance, a chimney with no liner can be cleaned with specialist tools, yet a liner can quickly be accessed and cleaned by hand, saving you time and money.
Need help with a repair or install? Get a free estimate online from top local home service pros in your area.
Is it necessary to have a chimney liner?
Other than optimizing the performance of your stove or heating equipment it can also be necessary to use a chimney liner if you have an older chimney which does not already have clay tile lining.
Even if you have a more modern chimney build, lining it is a cheaper option than replacing the clay tiles if they have suffered damage over the years.
What Type of Chimney Liner Kit do You Need?
With regards to the Do-it-yourself chimney liner kits, there are many different sizes and dimensions you can choose from, however, there are essentially only two varieties.
One that is referred to as a smooth wall double construction, while the other is known as a single wall construction that is typically corrugated. There are a variety of pros and cons for both types, which are as follows:
Smooth Wall Double Construction
Advantages
- The smooth wall means it’s easier to clean than the corrugated variety
- The smooth wall means that there is less chance of creosote build-up
- Will retain heat for longer thanks to the double wall piping
Disadvantages
Due to it being a heavier pipe it can be difficult to squeeze it down or past your damper, in which case you would need to use an additional flexible section of pipe to make the transition from your kit to your damper.
Single Wall Corrugated Construction
Advantages
- Cost effective option for those with a strict budget in mind
- Typically more flexible than double wall constructed kits and so it will easily fit over your damper meaning in typical circumstances fitting extra sections can be avoided
Disadvantages
Inner corrugated wall means it is harder to clean and allows more creosote to deposit over time
What Chimney Liner Kit Adapter Do You Need?
The adapter is another important component you need to factor into the type of kit you choose and this is determined by the type of heating appliance you are using.
There are two main types of adapters, one is called a Tee adapter, which is designed for wood burning stoves or fireplace inserts that typically have a rear vent. However, if you had an appliance with a top vent or an angled vent, you would opt for a stove top adapter.
How to Install a Chimney Liner Kit
First things first, it’s important to check you have all the necessary components in your kit before you begin the installation process. The kit should include the following materials:
- Top plate
- Stove top adapter
- Chimney cap
- The Liner
After you have checked that, when you first open your chimney kit, you will notice that it is coiled and in a protective plastic wrapper. Therefore, you will need to open it up and straighten it, ensuring you check for any damage that may impact its performance.

1. Measuring the Liner
The next step is to measure the chimney liner to your chimney and determine where you will need to cut to shorten it if necessary.
To do this, simply run the liner down to the bottom of your chimney and if there is a considerable amount left hanging, mark it up ready to be cut to the appropriate size. To achieve this, you will need a pair of tin snips to do the cutting and a hammer and screwdriver to create the initial starter hole.
2. Insulating your Liner
Insulating your liner is a regulatory requirement, which stipulates it must be at least half an inch, a common insulating material which is easy to acquire is called pro-foil.
This is quite easy to do, you simply need to wrap the liner once with the insulating material and use insulating tape to secure it in place. After you have done this, the final step is to wrap a layer of mesh around the insulation, which holds everything in place and protects the insulation from damage during the installation process and to help prolong its life in general.
Please note that since the liner are constructed of metal once cut they can be particularly sharp, as a result always ensure you wear a good quality pair of safety gloves at all times, during the assembly and installation process.
3. Fitting the Liner
The next step is to get on top of your roof and position your liner, ensure you do this with safety in mind and be wary of any power lines in your vicinity. You will usually need to bend your liner when maneuvering it into the chimney, and once in place, you will go back the bottom of your chimney and attach it to your stove or other heating appliance. You will then need to go back to the roof to finish off the installation by placing the cap and top plate.
4. Fitting the Adapter
Once your liner is in your chimney, if there isn’t an adequate amount hanging down at the bottom, you should pull down an adequate amount at the bottom of your chimney that will fit nicely into your stove adapter component. For example, if you had a stove top adapter, once it had been clamped to the hanging liner, this would slot down into the top of your stove.
Therefore, ensuring the adapter is positioned with the clamps facing the hanging liner, slot it in place and once happy tighten the clamps. Once the adapter has been secured to the chimney liner, simply position your insert in place and slot the adapter now attached to your chimney liner into the appliance stove top.
5. Fitting the Top Plate Chimney Cap
Lastly, you will need to go back to your roof and fit your top plate and chimney cap, this is quite easy to do, but be wary of the masonry and therefore the types of screws you use.
The top plate will slot over the top of your liner and over your chimney hole, providing a neat cover helping to protect your liner and helping to further improve insulation.
Beforehand place a bead of silicone around the edges of your chimney top and once positioned in place, you will need to screw it in position, however, as mentioned be careful of the masonry work as materials such as terracotta can be brittle.
Therefore, I would recommend a smaller sized screw. Once screwed in position, you will want to make it extra secure by placing some bricks on top of the plate.
If the liner is protruding too far up you will also need to shorten it before you place the chimney cap on top. You will only need a few inches remaining, therefore if required use tin snips to cut the liner and a screwdriver to create a starter hole.
If this seems too inconvenient, you could also cut it using a saw, for example, a Sawzall. Once cut to the correct size, you will again need to place a bead of silicone between the top plate and liner to protect your chimney from rain and pests. Don’t worry about the aesthetic appeal at this stage as the chimney cap will cover everything up.
Finally, place the chimney cap over the top of your liner and top plate, this should slide on very easily. At this point, all that is left to do is to tighten the clamps in position and you’re done.
What Makes a Good Chimney Liner Kit?
To select the best chimney liner kit you first need to determine the dimensions of your chimney and stove pipe. Sizes typically start at around 5 inches in diameter but can go to a width of 30 inches.
Additionally, you want a stove liner that is insulated well to maximize efficiency or one that can be insulated after purchase. It’s also advisable to select one that has a lot of flexibility for easy fitting and maintenance.
A liner kit that comes accompanied with step by step instructions and labeled components is always preferred, simply because it saves you time having to work it out alone. Furthermore labeling components provide visual guidance which is found by many people including professionals to speed up the process.
As stated by UL 103 testing guidelines, you’ll also require piping that is capable of withstanding temperatures of at a minimum of 1,400F for at least one hour.
Today, you will find that most liner kits do meet this requirement, yet you should always double check the product description or packaging, for this reason, it is often better to opt for a reputable brand with a sound reputation.
What Makes a Good Chimney Liner Kit?
It is important to consider two main things when installing your chimney lining. Firstly, you will need to ensure your piping is being installed in accordance with local regulations. In total, you can expect to pay an average of around $500 to $600 for your chimneys renovation, which includes liners, insulation, and piping.
If you’re currently in the planning stage, or just need a little extra heat in certain drafty parts of your home, then you may want to think about buying a space heater.
Final Words
Fitting a chimney liner kit doesn’t have to be hard work thanks to the innovation of chimney liner kits. However it’s important for you to realize that all kits have not been made equally, they will vary in size, quality and attention to detail.
The truth is that the only sure way to secure a chimney liner you can put your trust in for a reasonable cost is to buy from a well-trusted brand with positive user reviews.

About the Author
Dave Miller is a HVAC technician with over 10 years in the industry. Dave created HeatTalk with the ambition for it to become a resource for individuals looking for answers, whether they be a layman, student or a professional.